15 Foam Roller Stretches
Thank you for joining me for my first blog post! Many of you know that I suffer from chronic knee and back pain so I wanted this first post to be a practical one loaded with exercises that I regularly do. And you can too!
Training and working as a physical therapist and Pilates instructor has given me the education and tools to help folks rehabilitate from injuries and to safely progress an exercise program without fear of being injured.
As Joseph Pilates said, “Physical fitness is the first requisite of happiness. Our interpretation of physical fitness is the attainment and maintenance of a uniformly developed body with a sound mind fully capable of naturally, easily, and satisfactorily performing our many and varied daily tasks with spontaneous zest and pleasure.”
Joe had it right! The better shape I’m in, the better I feel. The better I feel, the happier I become.
Sounds simple enough!
A vital piece of a uniformly developed body is flexibility. Using a foam roller can be a valuable part of a warm-up, cool down, or rehabilitation of injured muscles. Rolling improves circulation, which gets the body ready for a workout and helps it recover afterward. And it feels great! This self-myofascial release technique massages muscles and breaks down knots or trigger points that limit range of motion to prepare muscles for stretching.
Are you ready to start?
Check out these 15 Foam Roller Stretches…
Always consult a physician before performing this or any other exercise program. When using the foam roller for stretching, follow these basic tips. To mobilize soft tissue, 8-10 repetitions should be sufficient. The number of sessions will be determined by the tightness of the soft tissue. Tight areas may require 5-10 minutes of daily rolling, but frequency will decrease as you notice an increase in flexibility or decrease in tenderness.
1. Cervical Spine/Suboccipital Release
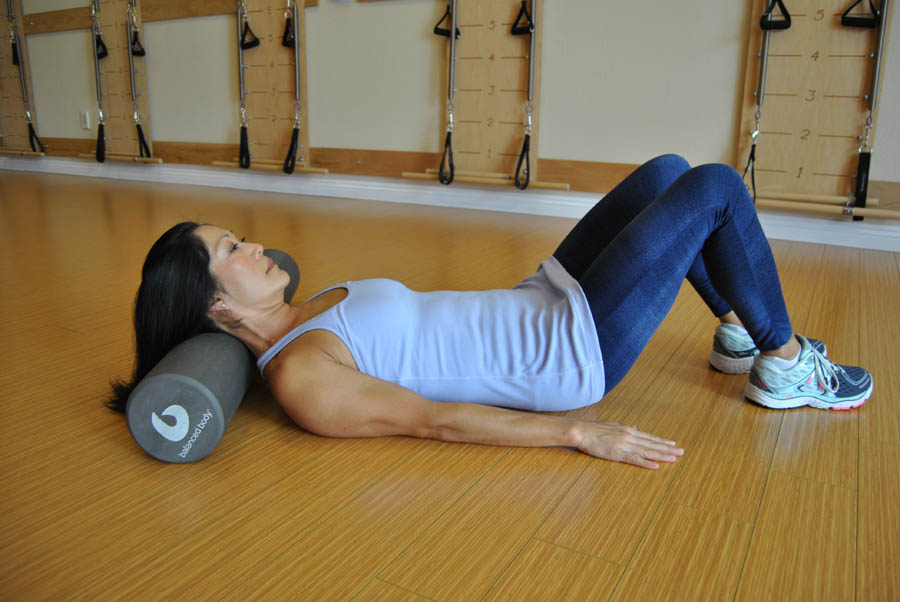
Lie on your back and place the foam roller under your neck. Slowly shake your head “no” and roll your head from right to left. Place the roller a little lower or higher and repeat. Do NOT press your head or neck into the roller to add more pressure. The neck is very sensitive and the natural weight of your head provides sufficient pressure.
2. Pectoral Stretch
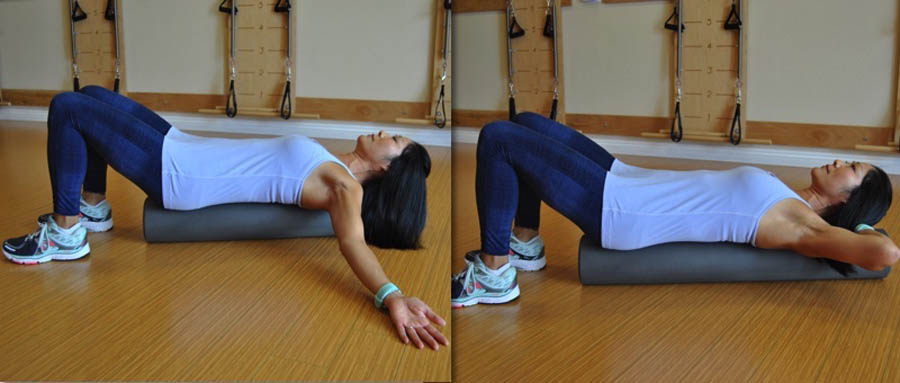
With your knees bent and feet flat on the floor, lie on the roller so it runs the length of your spine. Stretch your arms by your sides and slowly slide them along the floor making “snow angels”. You can also place your hands behind your head and open your elbows towards the floor.
3. Thoracic Spine/Rhomboids
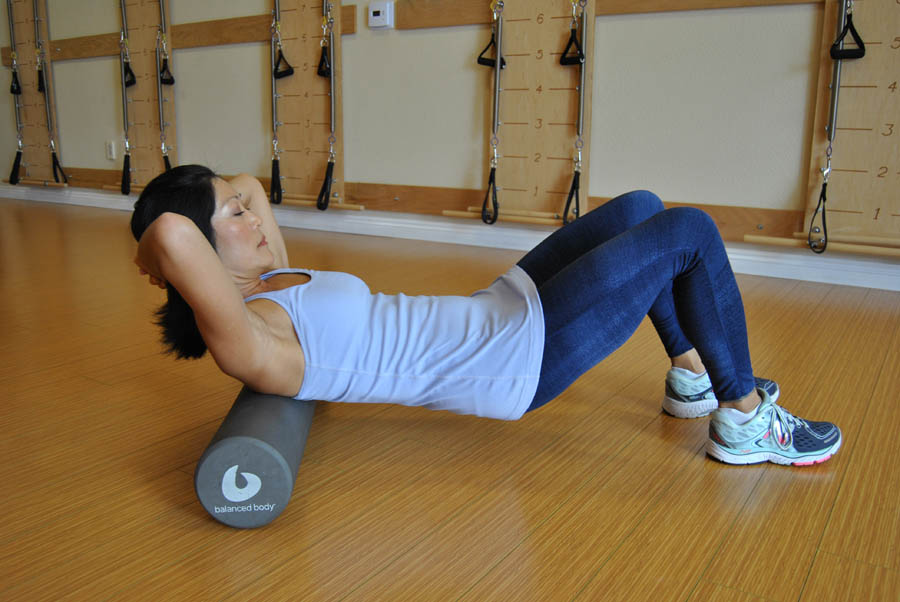
Place your hands behind your head (or cross arms over your chest) and spread your shoulder blades apart. With feet flat on the ground, engage your powerhouse (aka core muscles) and raise your hips above the ground. Roll the upper and mid-back areas on the roller, avoiding both the neck and low back.
4. Thoracic spine mobilization into extension
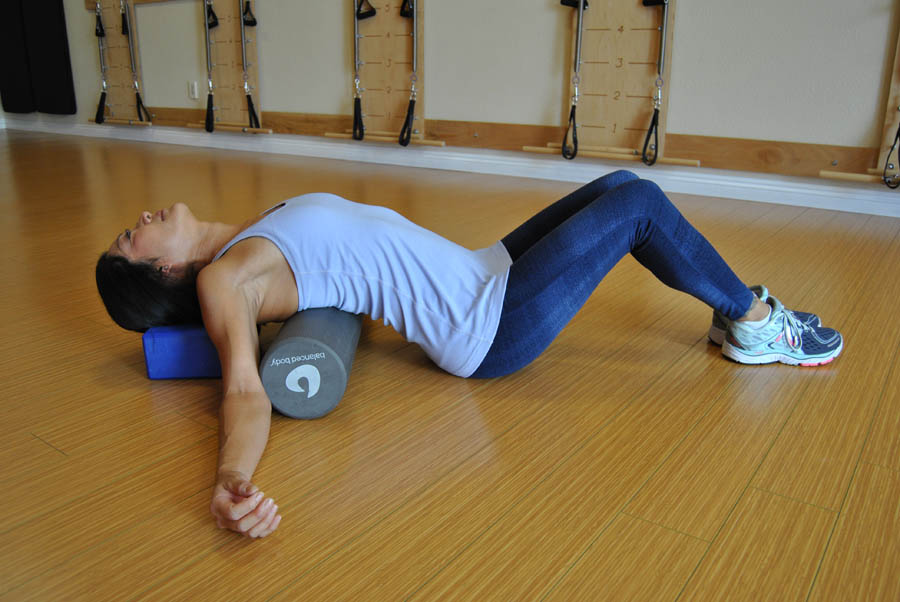
Sit on the floor with your feet flat on the ground or legs extended straight. Lie face up and place the foam roller under the middle of your back/lower part of your rib cage. If your head does not comfortably rest on the ground, use a block/pillow to support your head at the appropriate height so you can relax into this stretch. Reposition the roller a couple of vertebrae higher up and relax into the stretch. Continue to reposition & stretch a couple of vertebrae at a time until the roller is at the top of the shoulders.
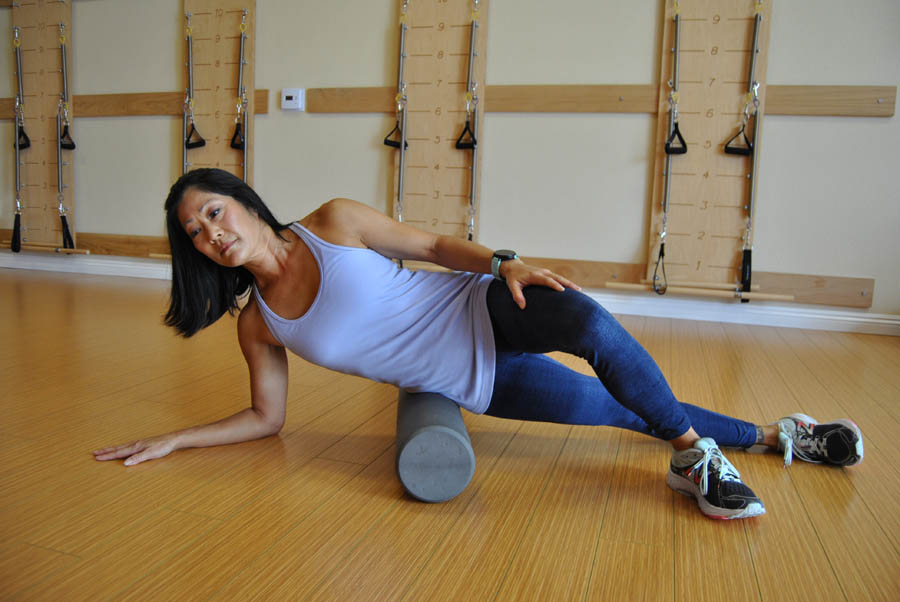
5. Latissimus Dorsi (aka “Lats”)
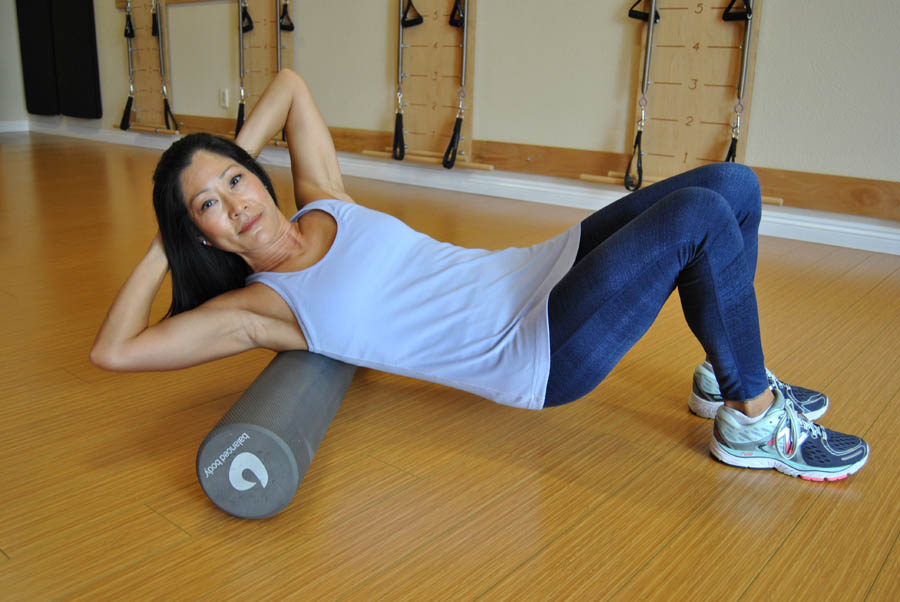
Position your right side on the roller, just under your armpit. Hands can be behind your head (or you can extend your right arm on the floor above the roller, keeping your thumb pointed towards the ceiling). Roll up and down from your armpit to just above the waistline. Repeat on the left side.
6. Forearms
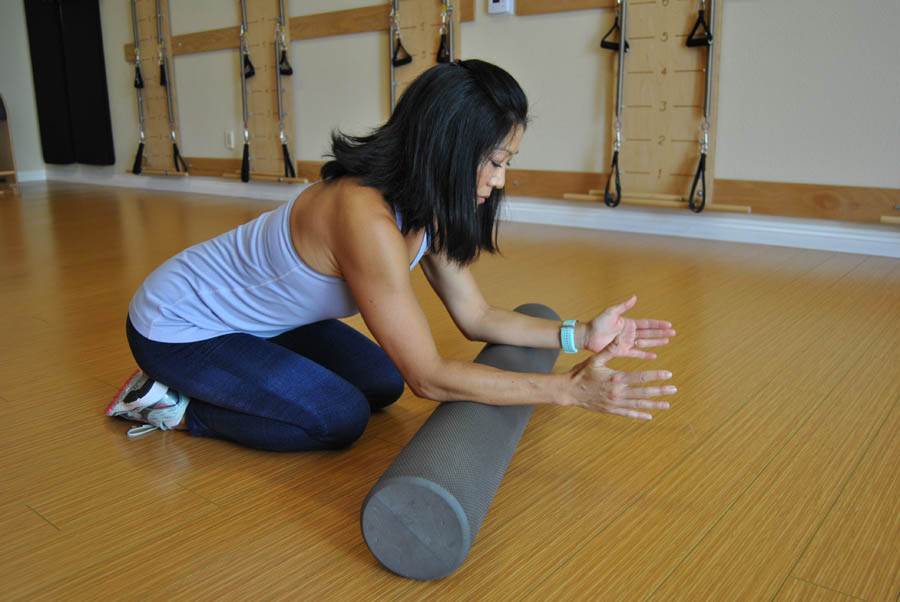
Kneel on the floor and place your forearms on the roller. Keep your spine in a neutral position and lean onto the roller. Roll along the forearms below the elbow and above the wrist. In addition, rotate your palms up to roll the back of the forearms and rotate your palms down to roll the front of the forearms.
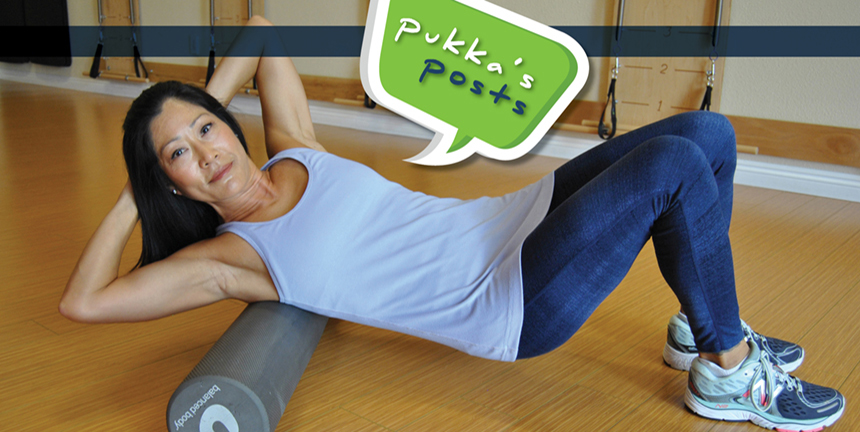
7. Piriformis & Gluteals (aka “The Butt”)
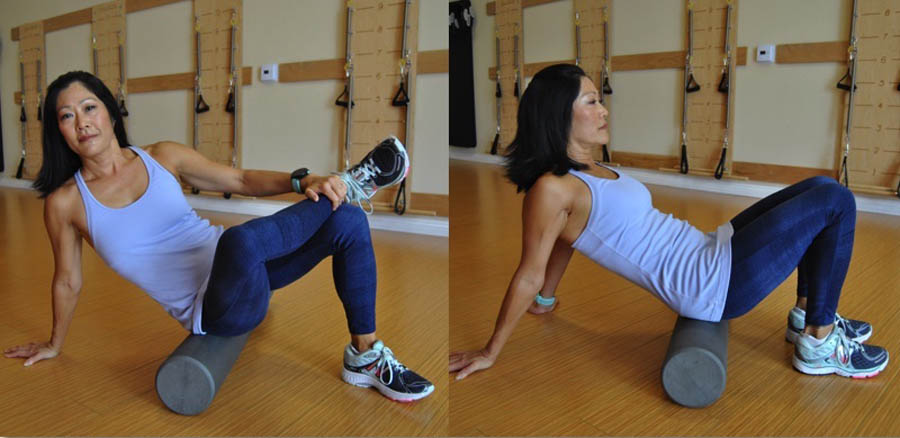
Sit with your right ankle crossed over your left knee. Rotate onto the right glute and hip area. Alternatively, you can sit on the roller with both feet flat on the ground and roll up and down your glutes.
8. Iliotibial (IT) Band
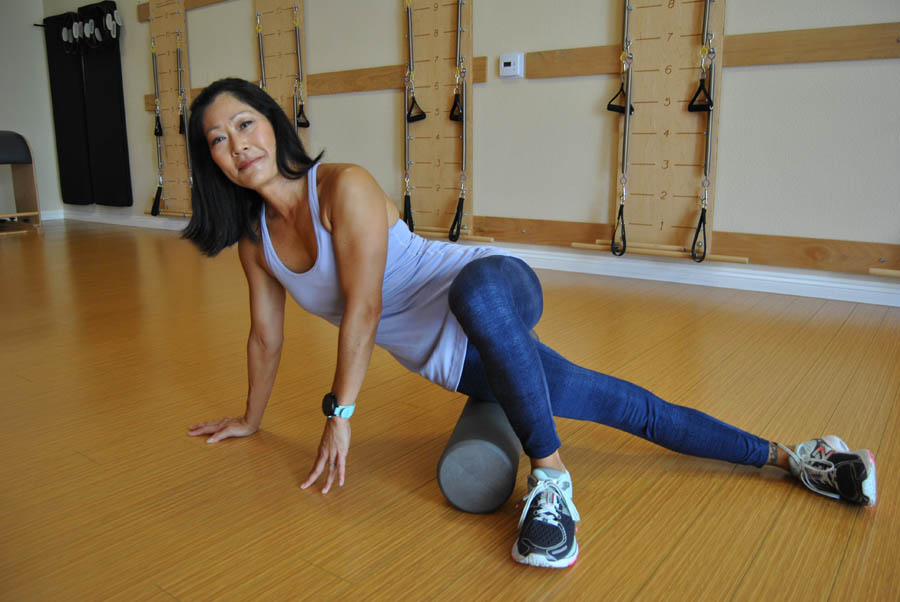
Position the outside of your right thigh on the roller. Cross your left leg over the right. Both hands are on the floor for support. Maintain your head in a neutral position and engage your powerhouse. Roll from just below your hip joint to above your knee. Repeat on the left side.
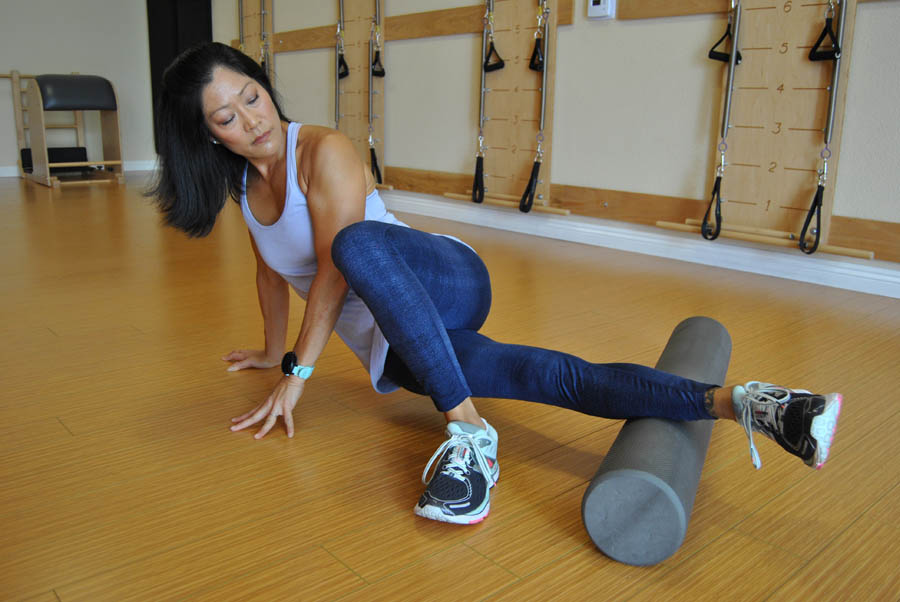
9. Tensor Fascia Latae (TFL)/Lateral Gluteals
Same set up as the IT Band, except place the roller just under the side of your pelvic bone (the soft tissue at the waist line is too high). Roll in a small range of motion. Repeat on the other side.
10. Hamstrings

Sit with the back of your legs on the roller and legs extended in front of you (you can cross your feet to increase pressure on one leg). Hands are behind you on the floor for support. Roll from your glutes to the back of the knees.
11. Quadriceps

Lie face down with the roller under your thighs (you can cross your feet to increase pressure on one leg). Forearms are flat on the floor to support your weight and the powerhouse is engaged to protect your back. Use your arms to roll your body from the pelvic bone to just above the knees.
12. Adductors/Groin
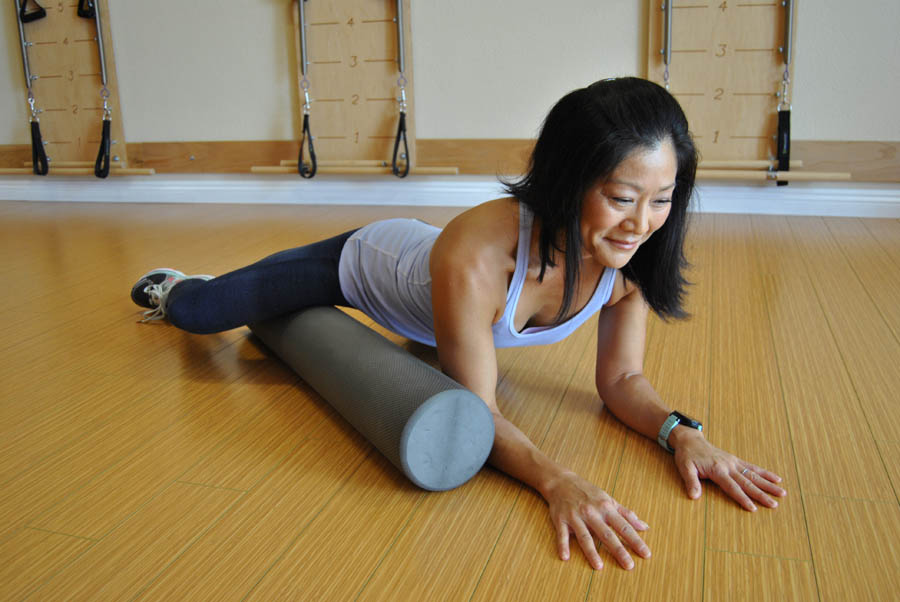
Lie face down and place the roller under your groin/inner thigh region. Keep your powerhouse & shoulder girdle engaged while rolling along the inner thigh.
13. Gastrocnemius/Calves
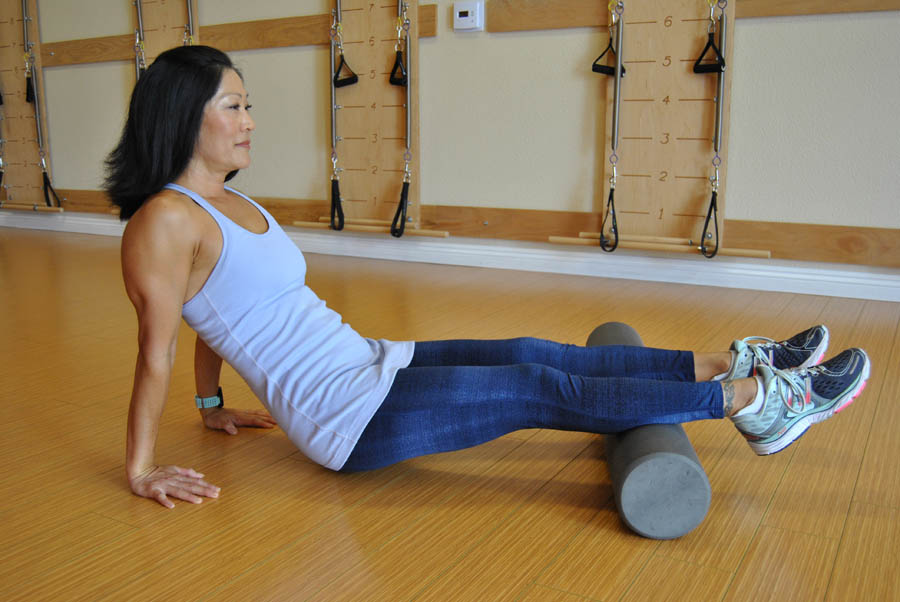
Sit with your legs extended in front of you and the roller underneath your calves (you can cross your feet to increase pressure on one leg). With your hands behind you on the floor, engage your powerhouse and lift your bottom off the floor. Roll from the knees to the ankles.
14. Peroneals/Lateral Calves
Same set up as IT Band, except place the roller underneath the outside of your calf. Roll from just below your knee to above the ankle.
15. Tibialis Anterior (aka “Shins”)
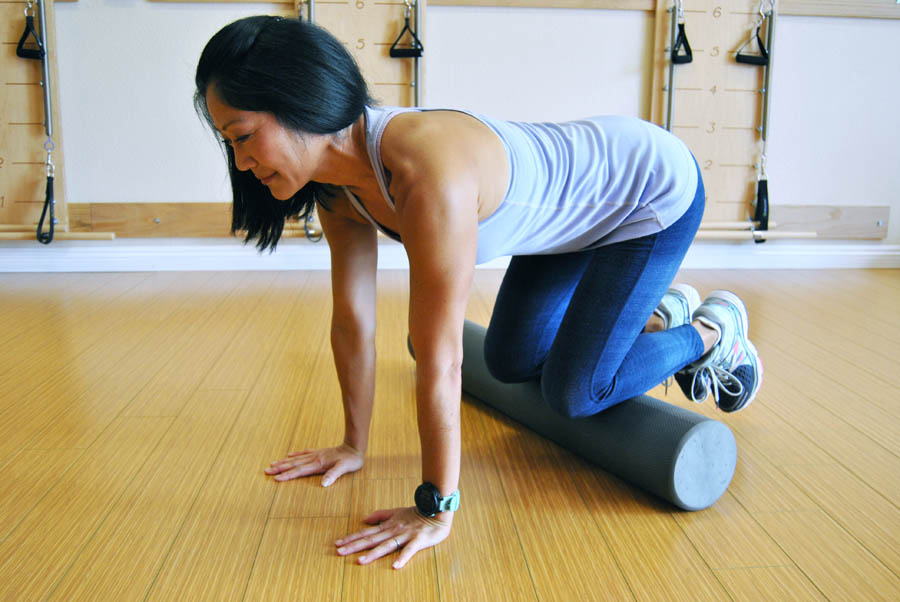
Kneel on your hands and knees with the roller underneath your shins. Shift forward so your shoulders are over your hands, and pull your knees towards your hands and then push them back to your starting position. Roll from your ankles to just below the knees.
Foam Roller Workshops
October 11th & 18th, 2017 at Pukka Pilates & Physical Therapy. Space is limited so reserve your spot by using the link below:
Pukka Pilates & Physical Therapy – Workshops
I look forward to seeing you there!